Not your average Marquee Light

A few weeks ago I checked out a local auction house in hopes of finding a nice stool to use with my new work table. This particular auction house is known for selling off returned items from some local and online big box stores so I thought it might be worth a shot.

As I was leaving the preview warehouse, I spotted this pallet of lights at the entrance.

3582

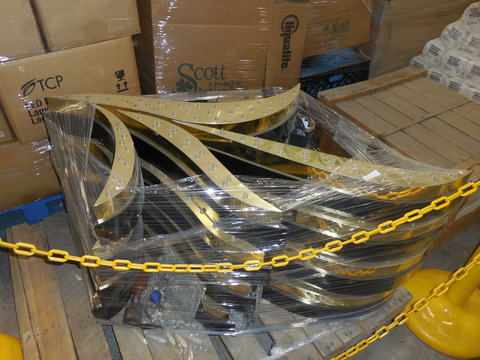
I thought to myself, those are kind of cool, I bet I could repaint them and turn them into a cool, unique, marquee sign. An upgrade from the cheap letters Michaels has been selling and something with a little more decorator flare. I also thought they would make great focal points for the lavish weddings I’ve seen on Pinterest. Then I talked myself out of even thinking more about it.

But I couldn’t resist the call of a good refurbish challenge so I bid on them and got all four, plus a bunch of other lighting, for really cheap. That was exciting, but then I immediately started to panic about how I was going to get them home–and what was my husband going say when came home to a pile of worn out casino lights. Thankfully my two boys were able to help me out and they went and picked it all up for me.

The wiring was more challenging than expected. At one point I tried to use a DIY lamp plug to hard wire the little lights, but as soon as I plugged them in . . . Pop, pop, pop, pow . . .they all blew. . Ugh! These marquee’s also have a yellow neon light on the back that I was too chicken to try and wire so back to the garage they went.

I searched high and low online for some replacement light options and was surprised that I couldn’t find what I needed. The bulb bases were too big or the lights too small with no way to secure them in. After a couple weeks of thinking and searching I finally found these plastic led bulb covers that worked perfectly with some customizable led lights. The light string can be set on a 6 hour timer and operates with either batteries or wall plug.

I’m just waiting on the string lights to arrive so I can finish up the first marquee. My dad showed me how to safely wire the neon and I was excited see that all of the work perfectly.

I’m going to finish off two of lights and leave two in an almost finished state so I can customize the colors for the next buyer. Check out my photos below for my progress so far.

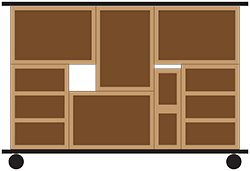
The signs in their original state:

2016-09-07-09-20-39

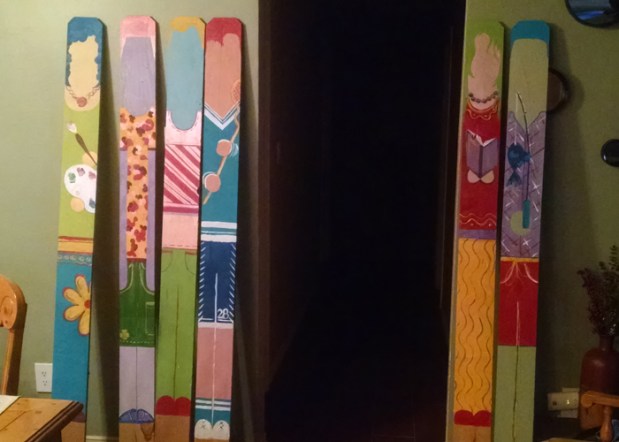
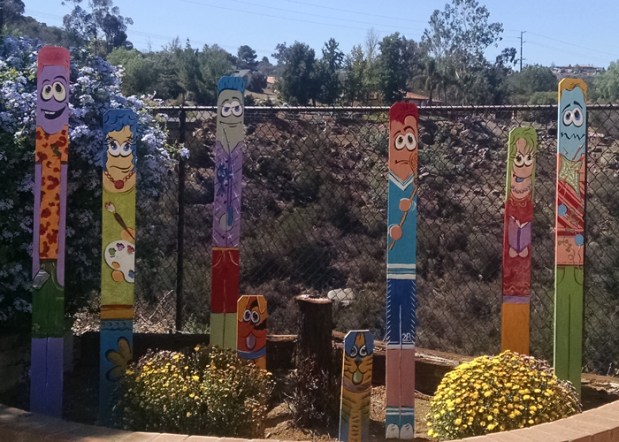
The signs in progress:

2016-09-07-09-19-58

An almost completed sign in distressed teal and silver (just waiting for all the lights)

2016-09-07-22-01-46

A new color choice of red and silver:

2016-09-10-19-59-00

I will be selling these for $200 each through my Etsy Shop. Shipping will vary depending on the service and the distance they need to travel. Message me for a custom quote.

Check back soon for images of the finished products. I have four signs to sell and will customize with your colors.


Studio Arts Table

So I’ve been quite busy the past few months trying to set up and organize an art studio out of the spare bedroom. After perusing Pinterest and some furniture sites I came up with the idea for a two-sided craft table that could split apart to reveal inner storage for my large tablets and outer storage for all the random supplies I have accumulated.

I originally wanted to build the table out of old wine boxes but couldn’t get my hands on any that wouldn’t cost an arm and a leg. I then stumbled upon some good crate options at Joann Fabrics.

I worked out a plan on paper:

Table Design

Then I painted the boxes and decided to build a bedside tower stand using the same idea. This helped me work out any kinks before starting the larger table. I put this on a 1/2″ piece of plywood, set on wheels and included some hidden storage in the back. The boxes are both glued and screwed together.


Front Book Tower Back Book Tower

I enlisted the help of my very talented father-in-law to assist with the construction of the table. It needed to be more finely tuned so that the table top would match up nicely when the two sides meet. He has the patience and skill set to refine things as needed. It was a tad challenging because the crates are not very consistent and the drawer crates are a slightly different size than the open crates. A little sanding, planing and filling of gaps worked it all out though.

Table Side 1 Table Side 2.png

My studio also doubles as a guest room so I designed the table to pull apart so I can push it against a wall when I have company and it will be out of the way.

Table Open Wall.png

and it has hidden storage for my large tablets and unhung paintings. Both sides utilize four wheels which makes it very easy to roll around, get in and out of doors and move as needed.

Table Insides.png


The cost for the table:
Crates, including the ones with drawers  $250. The maple plywood top, standard 5/8 plywood bottom, wheels, latches and few misc items cost another $200. The total ended up being around $450 for the table.

The bedside tower was about $120 with all the crates, wood, wheels and glue.

I’m sure this is going to be an investment well made over the coming years!


Fence Board People

FenceFamilyMainPhoto

This project was a little more crafty than what I would consider fine art. Nonetheless, it was a fun, cheap project that added some fantastic whimsy and color to our garden area. I was motivated to get this done quickly because I needed to fill some empty space outdoors for my Grandmother’s 90th Birthday Party.

I first got the idea from perusing Pinterest where I saw tiny picket fence boards painted like little people. I took that idea and blew it up to full size cedar fence boards. I decided I wanted each board to represent a member of my family so as I drew them out, I kept that in mind.

  1. I started the project by brushing off the loose dust and drawing outlines for my fence family.

Step 1

2. Then I started adding colors and patterns for interest. I saved money by using the acrylic craft paints I already had on hand.

Step 2

3. Because I wanted the fence people to represent each person in my family I added fun character traits to each one. One of my sons like to fish so he got a fishing pole and my other son plays lacrosse so he got a stick. I daughter got a book and her husband is an electrical engineer so he got a kite (think Benjamin Franklin and the first kite). I gave myself an art pallet and my a cell phone because he’s always on the phone

Step 3

4. After adding those details I added eyes and facial features.

Step 4

5. I got them done just in time for the party and planted them out in the yard among some newly purchased mums. I also quickly added our two dogs and a cat to the mix.

Step 5